
Introduction
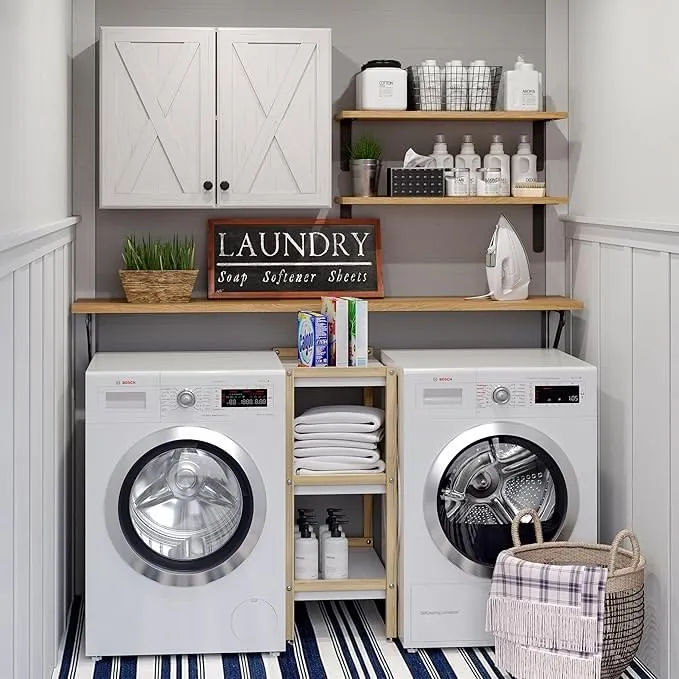
Wall-Mounted Cabinets for Laundry Rooms are among the most effective upgrades you can make to a home. They convert unused vertical wall space into structured storage, reduce visible clutter, and help the entire room feel more organized, streamlined, and purposeful. In a space that regularly handles detergents, cleaning supplies, baskets, linens, and daily-use items, well-planned upper storage delivers both visual and functional improvement.
A carefully designed cabinet system does more than enhance appearance. It improves workflow, protects supplies from humidity and dust, and creates a more efficient environment around the washer, dryer, sink, and folding station. When everything has a designated place, daily tasks become faster, easier, and less stressful.
This guide is built to be comprehensive, practical, and user-focused. It explains how to choose the right laundry room wall cabinets, compares materials for humid conditions, covers sizing and placement rules, walks through installation basics, and highlights common mistakes to avoid. It also includes design inspiration, maintenance tips, and expert-backed answers to frequently asked questions.
Why Wall-Mounted Cabinets for Laundry Room Spaces Work So Well
Laundry rooms often suffer from one major issue: disorganized storage. Bottles, sprays, cloths, and tools quickly accumulate, creating a cluttered and inefficient space. Wall-mounted laundry cabinets solve this by utilizing vertical storage instead of consuming valuable floor area.
This vertical strategy offers several advantages. In small laundry rooms, it keeps the floor clear, making the space feel larger and easier to navigate. In larger rooms, it creates a Cohesive and built-in appearance while improving accessibility.
Another major benefit is consistency. When items are stored in a dedicated cabinet system, everything becomes predictable. You know exactly where supplies are located, which reduces wasted time and improves daily efficiency.
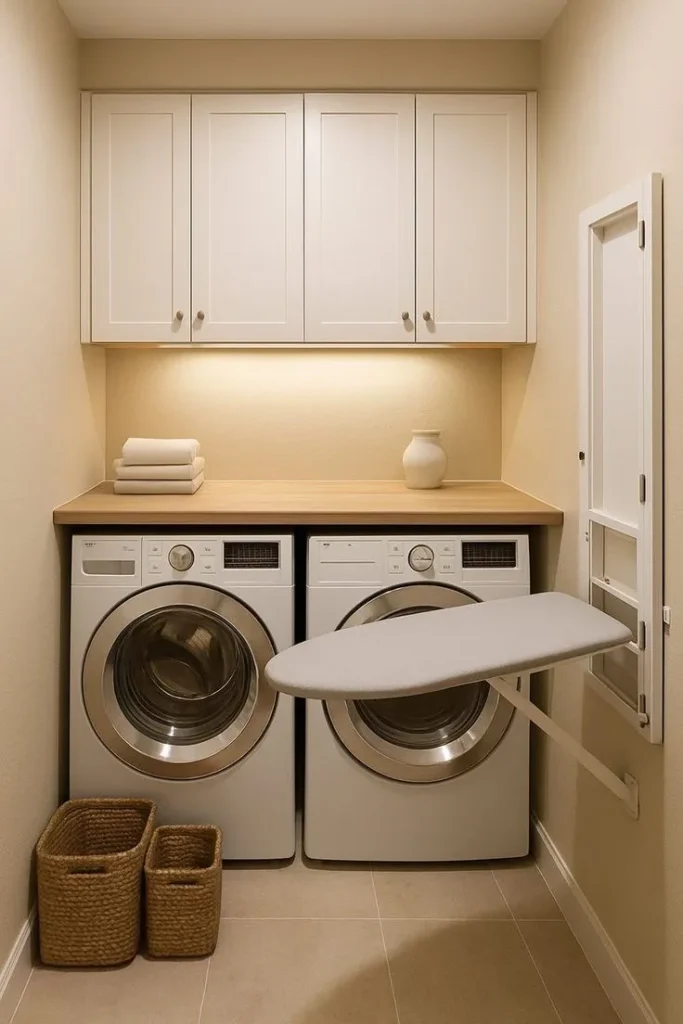
A well-designed laundry room layout typically combines:
- Closed cabinets for bulk storage
- Open space for working and folding
- Accessible zones for frequently used items
This combination ensures the room is not only visually clean but also highly functional.
How to Choose the Right Laundry Room Wall Cabinets
Choosing the right cabinets involves more than just style. It requires balancing durability, usability, and space efficiency.
Start with three essential considerations:
- Storage needs
- Available wall space
- Moisture and humidity levels
Choose the Right Material First
Laundry rooms are exposed to humidity, steam, and occasional spills. That makes material selection critical.
Here are the most common options:
| Material | Moisture Resistance | Durability | Best Use |
| Moisture-resistant MDF | Good | Moderate | Budget-friendly spaces |
| Sealed plywood | Very good | High | Family laundry rooms |
| Melamine/laminate | Very good | Good | Easy-clean modern setups |
| PVC / polymer | Excellent | Moderate | High-humidity areas |
| Stainless steel | Excellent | Very high | Industrial or heavy-use rooms |
| Solid wood (sealed) | Good | High | Premium designs |
Key insight:
Finish and sealing matter as much as the material itself.
A properly sealed mid-range cabinet can outperform a poorly finished expensive one.
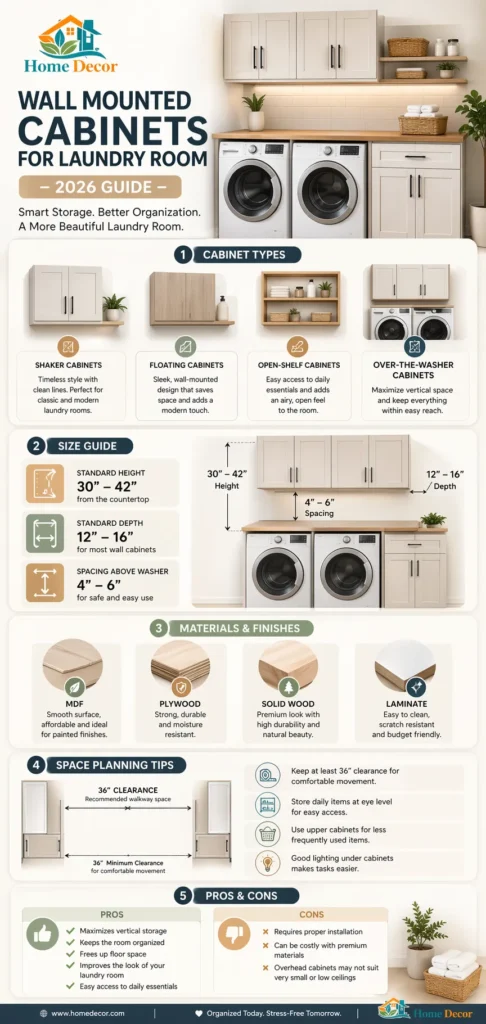
Pick the Right Depth and Height
Cabinet dimensions directly affect usability.
- Standard depth: 12 inches (ideal balance)
- Clearance above counter: ~18 inches
- Reach zone: between eye and shoulder level
Avoid:
- Cabinets that are too deep (they feel bulky)
- Cabinets placed too high (hard to access)
Match the Style to the Room
Style should support function, not override it.
Popular options:
- Shaker cabinets: timeless, versatile
- Flat-panel cabinets: modern, minimal
- Wood-grain finishes: warm and natural
- Gloss finishes: sleek but require maintenance
Choose a design that complements your home while remaining practical.
Best Sizes, Layouts, and Placement Rules
A successful layout begins with appliances, not cabinets.
Planning Rules
- Measure the washer and dryer first
- Check door and lid clearance
- Allow space for vents and hoses
- Keep daily items within reach
- Avoid overcrowding walls
Common Cabinet Placements
Above the washer and dryer
Most practical and accessible option
Above folding counter
Creates a functional work zone
Over the utility sink
Ideal for cleaning supplies
Side wall installation
Works well in narrow rooms
Stacked layout systems
Best for small spaces
Layout Examples
Small laundry room
- Stacked machines
- 1–2 cabinets above
- Minimal visual clutter
Family laundry room
- Side-by-side machines
- Cabinets + folding counter
- Organized workflow
Large utility room
- Full cabinet run
- Tall storage unit
- Zoned organization
Installation Basics
Proper installation is critical for safety and durability.
Steps:
- Measure the wall and appliances
- Mark level line
- Locate wall studs
- Check clearance again
- Install support rail if needed
- Mount cabinet
- Secure into studs
- Recheck level
Safety Tips:
- Always anchor into studs
- Avoid overloading cabinets
- Ensure door Clearance
- Use proper tools
Design Ideas for Every Budget
Modern Style
- Flat panels
- Neutral tones
- Minimal hardware
Small Space Design
- Light colors
- Vertical storage
- Shallow cabinets
Luxury Look
- Custom cabinetry
- Soft-close hinges
- Under-cabinet lighting
Budget-Friendly
- Simple materials
- Smart organization
- Clean layout
Pros and Cons
Pros
- Saves floor space
- Reduces clutter
- Improves organization
- Enhances appearance
Cons
- Requires proper installation
- Can feel bulky if oversized
- Poor materials may warp
Common Mistakes to Avoid
- Mounting cabinets too high
- Ignoring moisture exposure
- Skipping stud installation
- Blocking appliance doors
- Overcrowding the wall
- Choosing the wrong depth
Maintenance Tips
- Clean spills immediately
- Ensure proper ventilation
- Avoid storing wet items
- Inspect hardware regularly
- Use storage bins inside cabinets
Future-Ready Laundry Room Ideas
- LED lighting under cabinets
- Adjustable shelving
- Hanging rods
- Door storage systems
- Ceiling-height cabinets
Flexibility is key. Choose systems that adapt over time.
Quick Buying Tips
- Measure first
- Prioritize moisture resistance
- Keep daily items accessible
- Balance open and closed storage
- Focus on functionality over trends
FAQs
For most laundry rooms, 12 to 15 inches is a practical depth because it provides enough space for detergents, towels, and cleaners without making the cabinet feel oversized. A 12-inch upper cabinet is especially common and works well in many layouts because it balances storage and comfort.
Sealed plywood, moisture-resistant MDF, melamine, PVC, and stainless steel are all strong choices. The best option depends on the room’s humidity, the budget, and the style you want. Moisture resistance should always be a priority. Moisture-resistant MDF is useful in humid rooms, while plywood is often more stable when humidity fluctuates.
A common rule is to leave about 18 inches between the countertop and the bottom of the wall cabinet. That spacing creates a comfortable work area and helps the room feel more usable for folding and sorting.
Yes, many homeowners can handle the installation if they measure carefully, use a level, locate the studs, and fasten the cabinet securely. The key is safety. Laundry cabinets should be mounted properly because they may carry heavy items. If the cabinet is large or the wall conditions are uncertain, professional installation may be the better choice.
Yes. They are one of the best storage solutions for small laundry rooms because they use vertical space instead of consuming valuable floor area. Stacked appliances and wall cabinets can make a small room feel much more efficient.
Conclusion
Wall-mounted cabinets for laundry room spaces are one of the most efficient ways to upgrade both functionality and appearance. With the right material, proper measurements, smart placement, and secure installation, you can transform a cluttered utility space into a clean, Organized, and highly usable area. The key to success is simple: plan carefully, prioritize durability, and design around real daily use—not just aesthetics.